1. Prepare wall by removing any lumps/bumps using a scraper and sanding block. Fill any voids/holes with filler and leave for at least 24 hrs. Touch up flattened areas with a matt paint. It is recommended to ensure optimum adhesion, that a matt surface is preferable to a gloss surface.
2. Your mural will come to you roll packaged in order of sheet number. Carefully remove rolled mural from packaging, ensuring not to use scissors or sharp objects to cut packaging. Doing so may risk damage to mural.
3. Open out mural and un-roll sheet 1 only. This will be the first sheet you see and will be numbered at rear. Lay out flat in preparation for hanging.
4. Each mural will come with a 50mm per side excess trim area. Each roll has a standard width of 600mm. As below diagram (A), using a spirit level and pencil, mark a plumb-line on wall for first sheet, 550mm in from left hand edge.
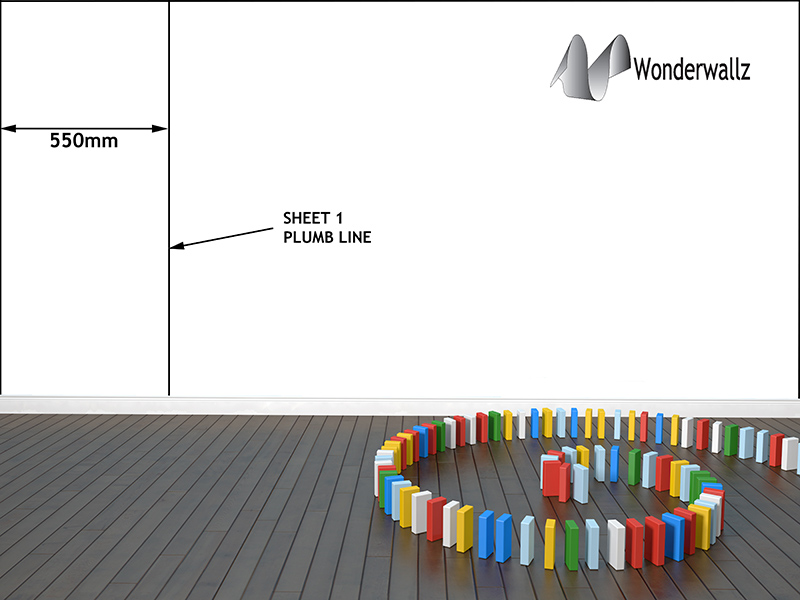 Diagram A (click to enlarge) |
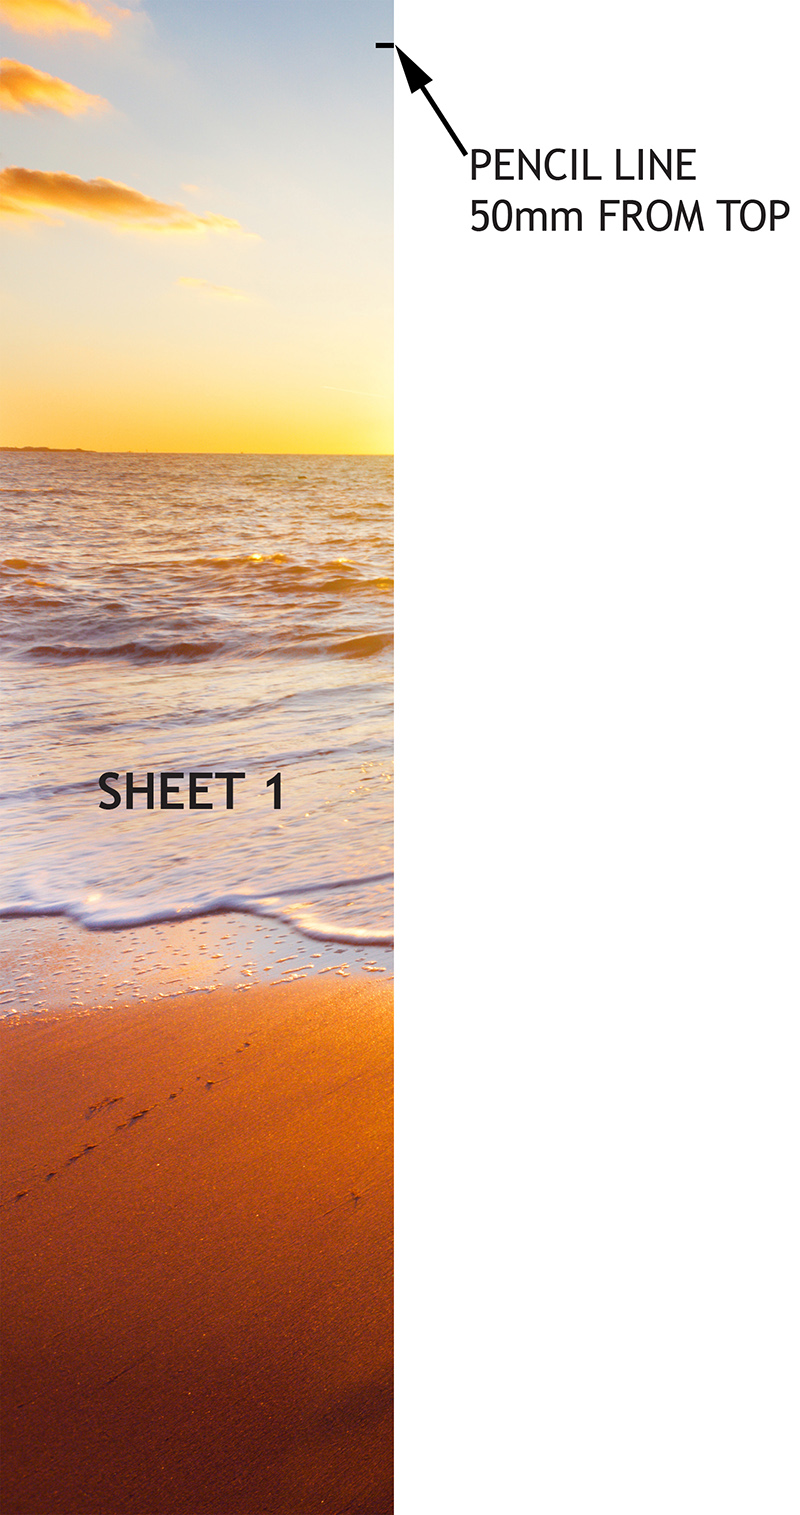 Diagram B (click to enlarge) |
Take sheet 1 and put a small pencil mark 50mm down from top edge, at right-hand side as per diagram (B). Both of these actions will be the guide for the excess trim allowance.
5. Take sheet 1 and peel back protective backing from top edge, down a distance of 12” – 18”.
Line up and stick image edge on right hand side of sheet to plumb line at top corner and small pencil mark to point were wall meets roof. Make your way down image edge, sticking edge to match plumb line. On completion of this, take the strain of left hand side, and slowly flatten image to wall, from right to left.
6. Repeat step 5 until you have reached bottom of sheet. It is important to ensure there are no air bubbles or wrinkles present. If there is, simply peel and re-stick until they disappear. It’s important to point out at this stage, that this media will peel and re-stick as many times as is needed, it won’t lose stickyness. It’s also important to point out at this stage that patience is the key, don’t rush it or adapt a ‘that’ll do it’ approach. If it needs adjusted, peel and re-stick.
7. On completion of sheet 1, take sheet 2 and peel back top 12” – 18”. Each sheet, after sheet 1 has a 10mm image overlap. See diagram C.
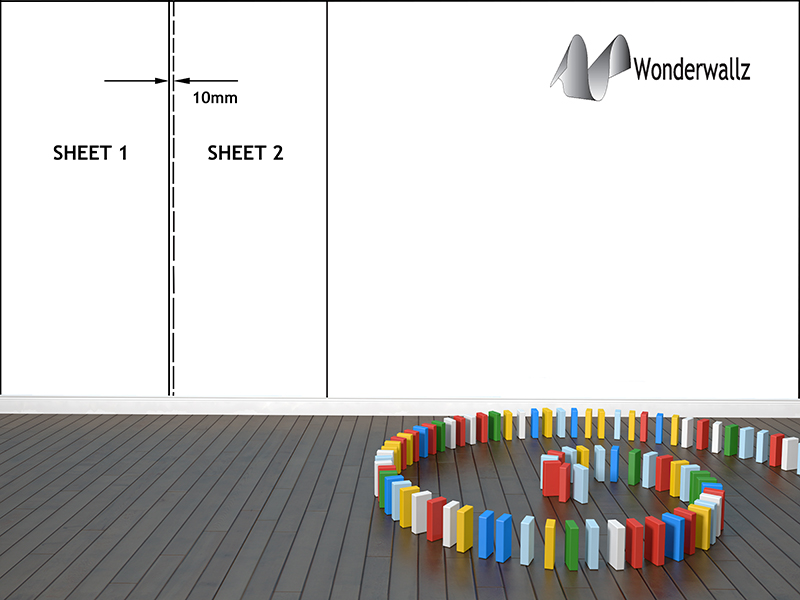
Diagram C (click to enlarge)
Position left hand edge of sheet 2, 10mm over edge of sheet 1 and using image edge/detail, start sticking left hand side of sheet 2 to wall. As before with sheet 1, take strain of right hand side of sheet 2 and slowly flatten sheet to wall from left to right.In 12” – 18” sections(or whatever you become comfortable with), stick remainder of sheet to wall.
8. Repeat this process for remainder of sheets until complete.
9. Using a craft knife/stanley blade and a straight edge/decorators paddle, carefully trim excess areas of mural to wall edges.
10. Put your feet up and enjoy your amazing new Wonderwallz mural!
THANK YOU FOR INVESTING IN A WONDERWALLZ WALL MURAL
YOUR BUSINESS IS GREATLY APPRECIATED.